Post-processing landscape images is an essential part of the landscape photography journey. From enhancing colors to adjusting exposure, post-processing can help bring your images to life and transform your photographic vision into reality. In this article, we will explore the various post-processing techniques available for landscape photographers, from the basics to more advanced techniques. We'll also look at the different software and tools available for post-processing, so you can decide which one is best for you.
Whether you're a beginner or a seasoned pro, this article will provide you with the information you need to take your landscape photography to the next level. So let's get started!Post-processing landscape images is a great way to take your photos to the next level and create stunning images. Post-processing involves a variety of techniques that can be used to enhance a photo and bring out its best qualities. Exposure control, color grading, sharpening, cropping, and creative effects are all elements of post-processing that can help you create eye-catching images.
Exposure Control is used to adjust the brightness and contrast of an image. This can be done by controlling the shutter speed, aperture, and ISO settings of your camera. Exposure control is an important part of post-processing since it allows you to make the most of your landscape shots. By adjusting the exposure of your image, you can make sure that the colors are true to life and that all details are visible.
Color Grading is another important element of post-processing. Color grading involves manipulating the colors in an image to achieve a certain look or feel. This can be done by adjusting the hue, saturation, and vibrancy of the colors in an image. Color grading can help bring out the beauty of a landscape shot and give it a more professional look.
Sharpening is a technique that is used to increase the definition and clarity of an image. This can be done by adjusting the sharpness and contrast of an image. Sharpening can help bring out the details in an image and make it look more vibrant and lifelike.
Cropping
is another technique that is used to improve an image.Cropping involves removing unwanted elements from an image to create a better composition. By cropping an image, you can ensure that all the important elements are visible and create a more balanced composition.
Creative Effects
are also used in post-processing to add an artistic touch to an image. This can be done by adding filters, textures, or other special effects to an image.Creative effects can help add depth and interest to a landscape shot and make it stand out from the crowd. Post-processing landscape images requires careful consideration of each technique used. It’s important to understand how each technique works and how it can be used to enhance an image. It’s also important to know when to use each technique and how to avoid over-processing an image. There are many software tools available for post-processing landscape images, including Adobe Lightroom, Adobe Photoshop, and GIMP.
Each tool has its own set of features and capabilities that can be used to achieve different post-processing effects. Post-processing landscape images can take your photos to the next level and help you create stunning images that capture the beauty of your surroundings. With careful consideration of each technique used, you can create beautiful images that will stand out from the crowd.
Color Grading
Color grading is an important part of post-processing landscape images, as it can help to bring out the true beauty of a photo. When color grading, you can adjust saturation, hue, contrast, and temperature to create the perfect look for your image. Saturation refers to the intensity of the colors in the photo.By increasing or decreasing saturation, you can make the colors appear more vibrant or muted. Hue refers to the overall color of the image, and by adjusting the hue you can create different tones and moods in your photos. Contrast refers to the range of light and dark tones in the photo, and adjusting it can help to make your image stand out. Lastly, temperature refers to the warmth or coolness of the colors in the photo, and can be used to create a certain atmosphere or mood.
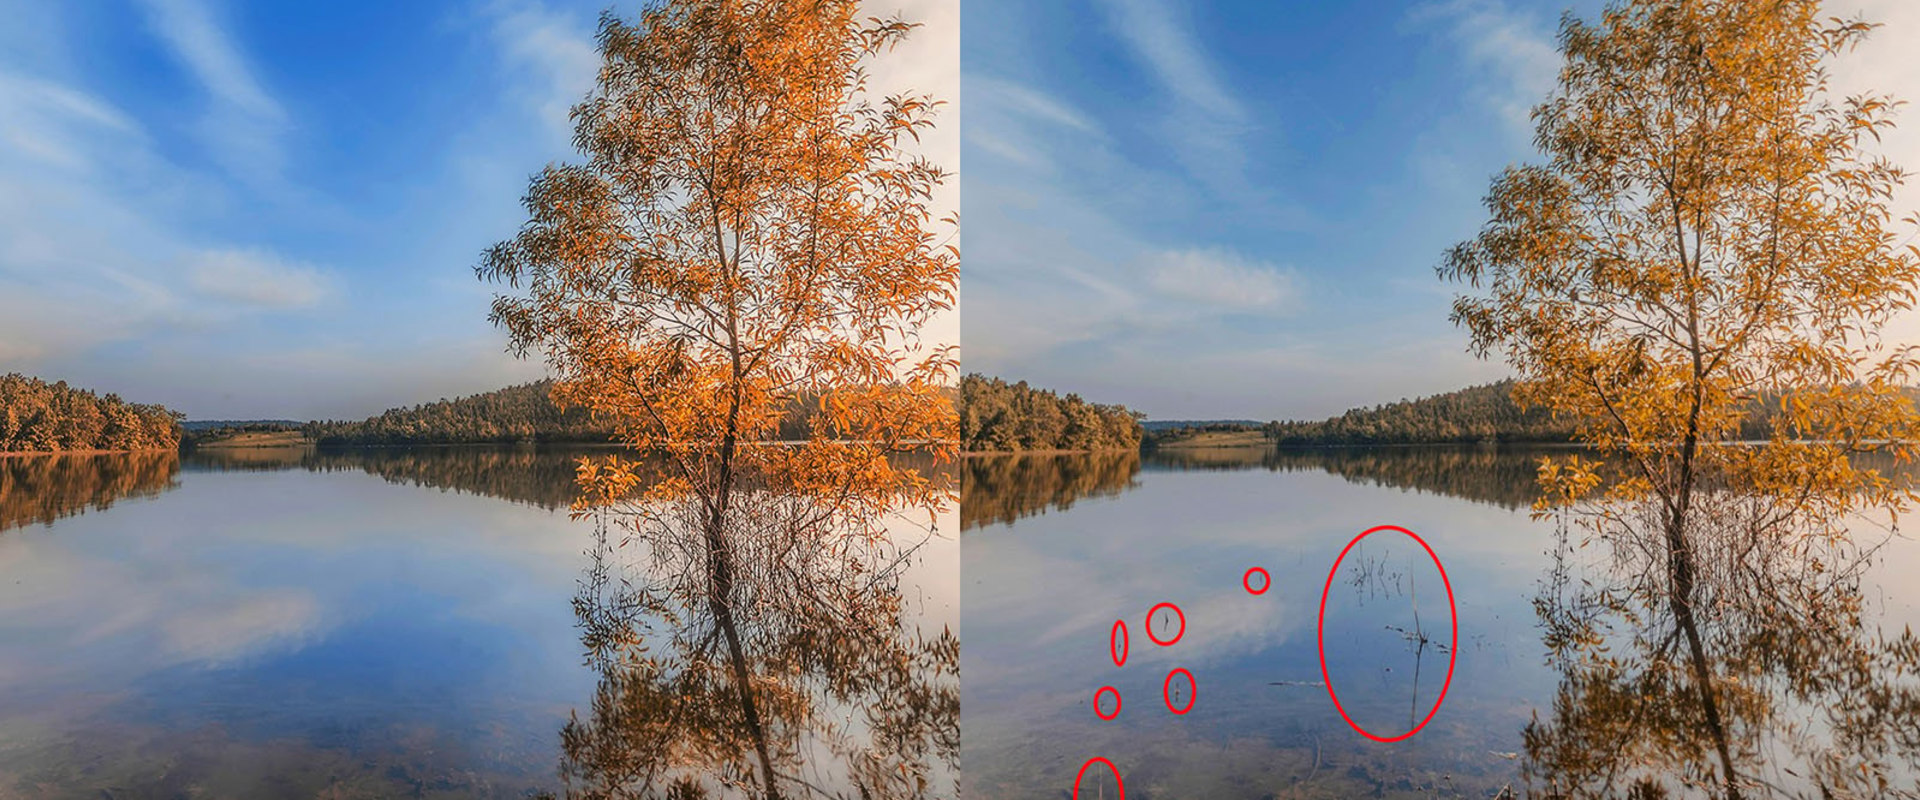
By using these techniques together, you can create stunning images that capture the beauty of your surroundings. To demonstrate the power of color grading, here are some before and after shots that show how adjusting saturation, hue, contrast, and temperature can transform a photo.
Exposure Control
Exposure control is a key component of post-processing landscape images. It involves adjusting the brightness, contrast, and color balance of the image in order to create the desired look.Exposure control can be used to bring out details in dark shadows or reduce the intensity of bright highlights. It can also be used to add warmth or cool tones to an image. Adjusting exposure is the most basic form of exposure control. This involves increasing or decreasing the overall brightness of the image and adjusting its tonal range. This can be done using levels, curves, or other exposure adjustment tools.
When adjusting exposure, it's important to make sure the image is neither too bright nor too dark, as both can take away from the aesthetic of the landscape. White balance is another important aspect of exposure control. This involves adjusting the color temperature of an image to make sure it looks natural and accurate. The goal of white balance is to make sure the colors in the image appear as close to what they would look like in real life. It's important to note that white balance adjustment should be done carefully, as an incorrect white balance can lead to an unnatural-looking image. Highlights and shadows are also key elements of exposure control.
Highlights are the brightest areas in an image, while shadows are the darkest areas. When dealing with highlights and shadows, it's important to adjust them in such a way that they complement each other. For example, if there are dark shadows in an image, you may want to reduce the intensity of the highlights in order to create a more balanced look. On the other hand, if there are overly bright highlights, you may need to darken the shadows in order to create a more pleasing composition. In order to demonstrate the impact of exposure control on post-processing landscape images, here are some before and after examples:
Example 1:

Example 2:
 As you can see from these examples, exposure control can significantly improve the look and feel of your landscape images.
By adjusting exposure, using white balance, and dealing with highlights and shadows, you can take your images to the next level.
Creative Effects
Creative effects can be used to add a unique touch and style to your landscape photos. These effects can be used to emphasize the main elements of the scene, create a certain mood or atmosphere, and make your photos stand out from the crowd. Popular creative effects include vignetting, split toning, creative filters, and more. Vignetting is a classic effect that darkens the edges of a photo to draw attention to the center. This can be used to create a vintage feel in your images or add a touch of drama.Split toning is another popular effect that adds color to the highlights and shadows separately. This can be used to add a unique color palette and help create a distinct atmosphere. Creative filters are also a great way to give your photos a unique look. From dreamy haze effects to dramatic black and white conversions, these filters can help you create stunning images with ease.
To show the impact of creative effects, it’s helpful to include before and after shots. This will help demonstrate how these effects can truly transform your photos. Post-processing landscape images is an important part of creating stunning images that capture the beauty of your surroundings. Exposure control, color grading, and creative effects can help take your photos to the next level. To get started, experiment with different techniques and find out what works best for you.
You can find more information about post-processing on photography websites or by joining a photography forum. With the right skills and techniques, you can create amazing landscape images.