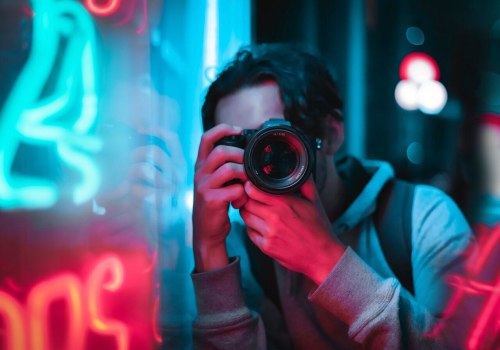
Creating stunning portraits is a skill that requires a combination of technical proficiency and artistic vision. While lighting, posing, and composition are essential components of creating beautiful images, post-production editing is often the key to bringing a portrait to life. Editing portraits in post-production can help add depth and texture to an image, while also helping to correct any issues or mistakes that may have occurred during the shoot. In this article, we'll explore the basics of editing portraits in post-production, including how to use Lightroom and Photoshop to enhance your images. The first step in editing a portrait in post-production is understanding the different tools available to you.
Common tools include brightness and contrast, color balance, saturation, sharpening, and noise reduction. Each tool has its own purpose and can be used to achieve a specific effect. For example, increasing the brightness of a photo can make it appear more vibrant, while decreasing the saturation can make it appear more muted. Understanding how these tools work and how they interact with each other is key to creating a successful portrait. Next, it's important to understand how to choose the right settings for your photo.
Different photos require different settings based on their lighting, composition, and other factors. For example, if a photo is too dark, increasing the brightness may be necessary to make the photo more visible. If a photo has too much noise, reducing the noise may be necessary to make the photo look cleaner. There are no one-size-fits-all solutions when it comes to editing portraits; each photo must be adjusted individually based on its own unique needs. Once you've chosen the right settings for your photo, it's time to start tweaking them.
This is where you can really bring out the best in your photo by making subtle adjustments that will enhance its overall look. For example, you may want to increase the contrast to add depth and definition to your subject's features, or you may want to reduce the saturation to make certain colors stand out more. You can also use curves or selective color adjustments to adjust specific areas of your photo. Finally, it's important to remember that post-production portrait editing is an iterative process. You should always review your edits before finalizing them and make any necessary tweaks as needed.
It's also a good idea to save multiple versions of your photo so that you can go back and make changes if necessary. This will help ensure that you're getting the best results from your editing session. In conclusion, understanding how to edit portraits in post-production is an essential skill for any aspiring photographer. With the right knowledge and tools, you can create stunning portraits that will make your photos stand out from the crowd.
Understanding Editing Tools
When it comes to editing portraits in post-production, understanding the different editing tools available is key. Editing tools like cropping, straightening, retouching, and color correction can all be used to improve a portrait and make it stand out.Cropping is used to remove any distracting elements in the background or to change the composition of the photo. Straightening is used to adjust the tilt of the photo, while retouching is used to remove any blemishes or imperfections. Color correction is used to adjust the color balance and saturation of a photo. Other useful tools include sharpening, which can be used to make the photo appear crisper and clearer, and vignetting, which is used to add a soft-focus effect around the edges of the photo. Some editing programs also offer additional features like adding text or creating special effects.
Editing tools
can help you bring out the best in a portrait and create stunning photos.Knowing how to use them correctly can make all the difference in post-production.
Iterative Process
The iterative process of editing portraits in post-production is essential to ensure you achieve the best possible results. Reviewing and saving multiple versions of your edits can help you to identify which adjustments work best for each photo, and allows you to compare the different versions side by side. This is especially useful when making subtle changes such as adjusting the contrast or color balance, as it can be difficult to determine which version looks the best. By saving multiple versions, you can go back and forth between them until you have a photo that you are happy with. It is also important to save multiple versions of a photo because it allows you to go back and make changes if needed.This could be anything from adjusting the contrast or color balance again, or even undoing certain edits that did not work out as you had hoped. By having multiple versions saved, it makes it much easier to go back and make changes without having to start from scratch. In conclusion, editing portraits in post-production is an iterative process that requires review and saving multiple versions of the image. This ensures that you get the best possible results from your edits, and allows you to make changes as needed without having to start over.
Choosing the Right Settings
When it comes to post-production editing of portraits, choosing the right settings is an important step. It can be daunting to select the correct settings for each photo, but by understanding the different editing tools, you can make the process easier.Start by choosing the right resolution. The resolution should be large enough so that your photo looks sharp and clear, but not so large that it takes too long to process. If you are unsure which resolution to use, check out some of the tutorials available online. Next, adjust the brightness and contrast of your portrait.
Brightness and contrast control how much light and color are in your image, so it is important to get it right. Play around with different levels of brightness and contrast until you find a combination that works well for your photo. Once you have chosen the right resolution and adjusted the brightness and contrast, you can start to fine tune other settings, such as saturation, sharpness, and hue. Saturation controls the intensity of colors in a photo; too much saturation can make a photo look over-saturated and unnatural.
On the other hand, too little saturation can make a photo look dull and lifeless. Sharpness controls how crisp and clear your image looks; too much sharpness can make a photo appear grainy and distorted. Finally, hue controls the overall color balance of a photo; if the colors in your photo are not balanced correctly, they will appear washed out or too vibrant. When selecting the right settings for a portrait, it is important to remember that no two photos are exactly alike. Experiment with different settings until you find a combination that works best for each individual photo.
With practice, you will become more familiar with post-production editing and will be able to create stunning portraits every time.
Tweaking Settings
When it comes to editing portraits in post-production, tweaking settings is key. This is where you can really bring out the details and enhance the colors of your photo. Understanding the different settings and how they work is essential to get the desired result. The first step is to adjust the exposure.This controls how much light is in the photo and can make a huge difference in your end result. You can use a slider to adjust the exposure, or you can use the “Highlight” and “Shadows” adjustments. Once you’ve adjusted the exposure, you can start to tweak the colors. This can be done by using the color balance adjustment tool, which allows you to adjust the hue, saturation, and luminance of a particular color.
You can also use the “Curves” tool to adjust highlights, shadows, and midtones. Finally, you can add contrast to your photo by using the “Clarity” adjustment. This will give your portrait more depth and make it stand out from the background. By understanding how these settings work and tweaking them accordingly, you can create stunning portraits in post-production. In conclusion, editing portraits in post-production is an important skill for any aspiring photographer.
With the right knowledge and practice, you can use editing tools to choose the right settings and tweak them to create stunning portraits. Iterative processes are also essential to ensure that your photos look their best. By mastering the basics of portrait editing in post-production, you can ensure your photos stand out from the crowd.